Dive into Decadence: Crafting the Perfect Creamy & Rich Salted Dulce de Leche Ice Cream
Imagine a dessert that's both deeply comforting and exquisitely refined. A spoonful that transports you to sun-drenched South American kitchens, yet feels perfectly at home in your own. That, my friends, is the magic of creamy, rich, salted dulce de leche ice cream. This isn't just any frozen treat; it's an experience. With luscious ripples of golden dulce de leche woven through a velvety base, punctuated by a delicate kiss of salt, this dulce de leche ice cream recipe promises an unforgettable journey for your taste buds.
Whether you're a seasoned ice cream enthusiast or a curious beginner, the allure of dulce de leche is undeniable. Its unique caramelized milk flavor is a world apart from traditional caramel, offering a depth and creaminess that's simply unparalleled. And when transformed into ice cream, especially with that essential hint of salt, it reaches new heights of deliciousness. Get ready to embark on a culinary adventure that will have everyone asking for seconds!
The Irresistible Allure of Salted Dulce de Leche
What exactly is dulce de leche? Translating to "sweet of milk," this beloved confection is a rich, caramel-like sauce made by slowly heating sweetened milk until it thickens and caramelizes. Originating from Latin America, its distinctive flavor profile is nuttier, less burnt-sugar bitter, and inherently creamier than typical caramel. It's truly in a league of its own.
Now, why introduce salt to such a sweet indulgence? The addition of salt, particularly flaky sea salt, is a game-changer. It doesn't just make the ice cream "salty"; instead, it acts as a phenomenal flavor enhancer. The salt beautifully cuts through the inherent sweetness of the dulce de leche, creating a sophisticated balance that deepens the caramel notes and prevents the ice cream from being cloyingly sweet. This creates a more complex and addictive flavor, making each spoonful more enjoyable and compelling.
Effortless Indulgence: The No-Churn Salted Dulce de Leche Ice Cream Recipe
For those who crave gourmet flavor without needing an ice cream maker, this dulce de leche ice cream recipe is your perfect match. The no-churn method relies on the magical combination of whipped heavy cream and sweetened condensed milk (or in our case, directly using rich dulce de leche) to create an unbelievably smooth, creamy, and decadent texture. It’s incredibly straightforward, making it ideal for impromptu dessert cravings or entertaining with minimal fuss.
Ingredients for No-Churn Delight:
- 1 (13.4-ounce) can high-quality dulce de leche
- 2 cups heavy whipping cream, well chilled and divided
- 2 teaspoons pure vanilla extract
- 1/2 teaspoon fine kosher salt
- Flaky sea salt, for serving (optional, but highly recommended!)
Step-by-Step Guide to No-Churn Perfection:
- Prepare Your Pan: Start by lining the inside of a standard 5x9-inch loaf pan with plastic wrap. Ensure you leave a generous 1-inch overhang on both long sides. This thoughtful step makes for effortless removal of your frozen masterpiece later. Set it aside.
- Create the Dulce de Leche Base: In a medium mixing bowl, combine the entire can of dulce de leche with 1/3 cup of the chilled heavy cream. Whisk these two ingredients together until they are thoroughly combined and smooth, which should take about a minute. The cream helps to slightly loosen the thick dulce de leche, making it easier to work with.
- Reserve for Ripples: Transfer exactly 1 cup of this luscious dulce de leche mixture to a large mixing bowl. This will be the foundation for your ice cream base. Keep the remaining dulce de leche mixture in its original bowl – this is your precious reserve, destined to create those beautiful, rich ripples throughout your ice cream.
- Whip the Cream to Stiff Peaks: Now, for the magic! In a separate, clean stand mixer bowl (or a large bowl with a hand mixer), pour in the remaining 1 2/3 cups of heavy cream. Add the vanilla extract and the fine kosher salt. Using the whisk attachment, beat the mixture on medium-high speed. Keep a close eye on it; you're looking for firm, stiff peaks to form, which typically takes around 3 minutes. The whipped cream should hold its shape when the whisk is lifted. A pro tip: Chilling your mixing bowl and whisk attachment for 15 minutes before whipping can help achieve stiffer peaks faster!
- Fold with Care: Gently fold the freshly whipped cream into the 1 cup of dulce de leche mixture you set aside earlier. Do this in three separate additions. The key here is to be delicate, preserving as much of the air in the whipped cream as possible. Continue folding until the whipped cream is fully incorporated and you no longer see any streaks of plain cream. This creates the light, airy ice cream base.
- Layer for Visual Appeal: Transfer half of the whipped cream-dulce de leche mixture into your prepared loaf pan, spreading it into an even layer. Now, take about half of the reserved dulce de leche mixture and spoon it evenly over this layer. Repeat the process with the remaining whipped cream mixture and the rest of the reserved dulce de leche.
- Swirl for Beauty: Grab a butter knife or a skewer and gently swirl the dulce de leche mixture and the whipped cream mixture together. Aim to create elegant, decorative ribbons and swirls rather than fully mixing them. This is where those beautiful ripples come from!
- Freeze to Perfection: Loosely cover the loaf pan with plastic wrap (or the overhanging plastic wrap you used earlier). Transfer it to the freezer and let it set completely. This will take at least 8 hours, but for the best, firmest texture, aim for 10-12 hours. Patience is a virtue when waiting for this treat!
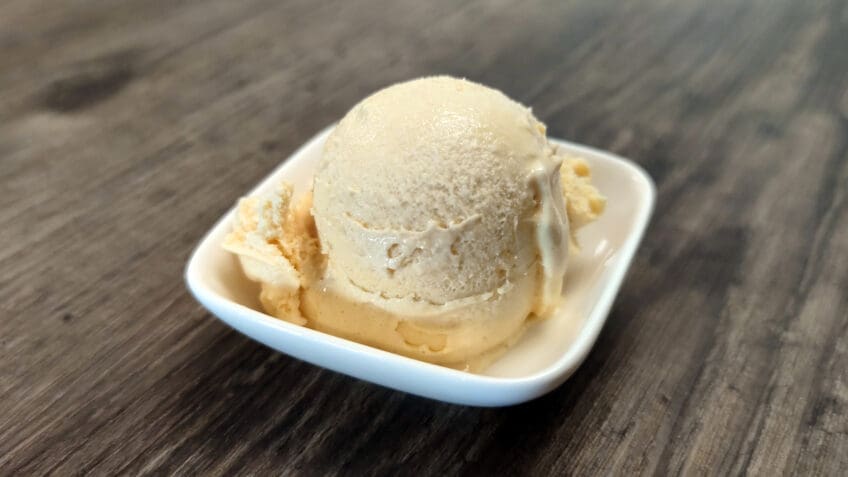
- Serve and Savor: When ready to enjoy, scoop generous portions into bowls or cones. For that ultimate gourmet touch and a delightful textural contrast, sprinkle generously with flaky sea salt just before serving.
For more insights into perfecting this method, check out our guide on Easy No-Churn Dulce de Leche Ice Cream: Creamy & Rich.
Elevating Your Experience: The Custard-Based Churned Dulce de Leche Ice Cream
While the no-churn method is fantastic for its ease, true ice cream aficionados often gravitate towards a churned, custard-based dulce de leche ice cream recipe. This traditional approach yields an incredibly dense, luxurious, and supremely smooth texture that many find irresistible. The custard base, made with egg yolks, provides an unparalleled richness and creamy mouthfeel that melts slowly and exquisitely on the tongue.
Overview of the Custard-Based Churned Process:
- Optional Homemade Dulce de Leche: For the ultimate depth of flavor, consider making your own dulce de leche. Simply place an unopened can of sweetened condensed milk in a pot of water, ensuring the can is fully submerged. Simmer gently for 3 hours, adding water as needed to keep the can covered. Let it cool completely before opening. Safety Note: Always ensure the can remains submerged and cool completely before handling to prevent injury.
- Crafting the Custard: Begin by warming heavy cream and milk in a saucepan until just steaming. In a separate bowl, whisk egg yolks with sugar until pale and creamy. Gradually "temper" the warm cream mixture into the egg yolks, whisking constantly to prevent scrambling. Return this mixture to the saucepan and cook over medium-low heat, stirring continuously, until it thickens sufficiently to coat the back of a spoon.
- Infusing the Dulce de Leche: Remove the cooked custard from the heat. Gently warm your dulce de leche (store-bought or homemade) to a pourable consistency. Whisk the dulce de leche thoroughly into the warm custard until completely smooth. Stir in vanilla extract and a pinch of salt. For the silkiest texture, strain the mixture through a fine-mesh sieve.
- Chilling and Churning: This step is crucial! Cool the custard mixture completely in the refrigerator for at least 4 hours, or ideally overnight. Once thoroughly chilled, churn the mixture according to your ice cream maker's instructions. At this stage, it will resemble a soft-serve consistency.
- The Final Freeze: Transfer the freshly churned ice cream to a freezer-safe container. For an extra layer of decadence, swirl in additional warmed dulce de leche. Press a piece of parchment paper directly onto the surface of the ice cream to prevent ice crystals, then cover and freeze until firm, usually about 4 hours.
Key Techniques for Churned Success:
- Tempering Eggs: This gradual introduction of hot liquid to egg yolks prevents them from scrambling. Slow and steady whisking is key.
- Cooking Custard: Maintain a gentle heat and constant stirring. The custard is done when it coats the back of a spoon and leaves a clear path when you run your finger across it.
- Thorough Chilling: A perfectly chilled base churns faster and results in a smoother, creamier final product. Don't rush this step!
- Straining: This removes any potential cooked egg bits or lumps, ensuring an incredibly smooth, restaurant-quality texture.
For a deeper dive into the world of custard-based ice cream, explore our comprehensive guide on Perfect Dulce de Leche Ice Cream with Custard Base.
Tips for the Ultimate Dulce de Leche Ice Cream Experience
- Choosing Your Dulce de Leche: While making your own from sweetened condensed milk is rewarding, high-quality store-bought dulce de leche (often found in the international aisle) works beautifully and saves time. Brands like La Lechera or Nestlé offer excellent options.
- The Magic of Salt: Don't skip the salt! Whether it's the kosher salt in the base or the flaky sea salt garnish, it's essential for balancing the sweetness and enhancing the rich caramel notes.
- Optimal Storage: Store your homemade ice cream in an airtight container with a piece of parchment paper pressed directly onto the surface to prevent freezer burn and ice crystal formation. Enjoy within 1-2 weeks for the best flavor and texture.
- Serving Suggestions: Beyond a sprinkle of flaky sea salt, consider a drizzle of extra warmed dulce de leche, a dollop of whipped cream, a scattering of toasted pecans or walnuts, or even a shot of espresso poured over the top for a decadent affogato.
- Softening Before Serving: For the ideal scoopable texture, let your ice cream sit out at room temperature for 5-10 minutes before serving. This allows it to soften slightly, bringing out its full creaminess.
Conclusion
Whether you opt for the simplicity of the no-churn method or the luxurious depth of a custard-based churned version, this dulce de leche ice cream recipe promises a truly divine dessert. Its signature creamy texture, rich caramel notes, and the essential hint of salt create a symphony of flavors that is both comforting and sophisticated. So gather your ingredients, clear some freezer space, and prepare to indulge in a treat that will undoubtedly become a treasured favorite in your home. Happy scooping!
